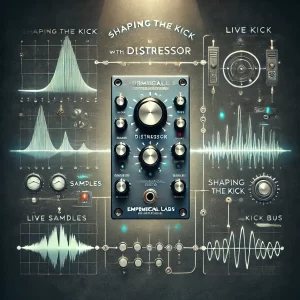
Why I Distress the Kick Drum
 The kick drum is supposed to be the foundation.
The heartbeat.
The weight under the song.
The thing that makes the speakers move.
But sometimes it refuses to behave.
Some kicks are inconsistent.
Some are too big.
Some are too soft.
And some are so perfect they actually feel fake.
This is where the Distressor quietly becomes one of the most useful tools in a rock mixer’s world.
Not because it fixes kicks.
Because it shapes their attitude.
The Distressor isn’t really a compressor in the traditional sense.
It’s more like a tone shaper for dynamics — a way of deciding how a kick drum lives inside the groove.
And the interesting question isn’t how to set it.
The interesting question is:
Where should it live?
The Live Kick
A live kick drum almost always benefits from compression.
Real drummers don’t hit the drum exactly the same way every time. That’s part of the music.
But in a mix, those variations can cause the low end to feel unstable.
Some hits jump forward.
Others disappear.
A Distressor on the live kick track can tighten that up while still letting the performance breathe.
What you’re really doing is guiding the energy of the drum.
Let the attack poke through.
Control the tail.
Bring the hits closer together dynamically so the groove feels steady.
Typical starting points:
- Ratio: 4:1 or 6:1
- Attack: Medium-fast to let the transient punch through
- Release: Medium-fast to keep the drum moving
Sometimes a little Dist 2 or Dist 3 adds harmonic density that helps the kick sit in the mix.
Not louder.
Just more present.
The Sample Kick
Kick samples are a strange thing.
They often arrive already sounding huge.
Sometimes too huge.
Perfectly shaped, perfectly loud, perfectly consistent.
And sometimes that perfection makes them feel disconnected from the track.
In these situations the Distressor can actually do the opposite of what compressors usually do.
It can make the kick feel smaller.
Not smaller in volume.
Smaller in size.
Clamping the transient slightly and adding subtle movement helps the sample tuck into the mix instead of sitting on top of it.
Typical starting points:
- Ratio: 6:1 or even 10:1
- Attack: Fast
- Release: Fast to medium-fast
The goal here isn’t punch.
It’s containment.
The Kick Bus
Sometimes the kick drum isn’t just one thing.
It’s a live kick and a sample working together.
The live drum provides character.
The sample provides consistency.
But together they can become enormous.
Too much low-end energy.
Too much size.
In those moments, placing a Distressor on the kick bus can help glue the pieces together.
Not heavy compression.
Just enough control to shape the overall footprint of the kick.
Typical starting points:
- Ratio: 4:1
- Attack: Medium
- Release: Medium-fast
The goal here is cohesion.
You want the listener to hear one kick drum, not two layered sources fighting for space.
Why Many Mixers Start With the Live Kick
A lot of experienced mixers place the Distressor on the live kick track first, not the bus.
Why?
Because the performance is where the life is.
Compressing the real drum shapes the groove itself.
The sample can then support it — not replace it.
But there are no rules here.
Sometimes the bus needs it.
Sometimes the sample needs it.
Sometimes the kick doesn’t need it at all.
Compression Is Really About Size
When you think about kick compression this way, something becomes clear.
You’re not just controlling dynamics.
You’re controlling size.
A kick can feel:
- Massive
- Tight
- Punchy
- Controlled
- Aggressive
- Contained
The Distressor simply gives you a way to decide which version belongs in the song.
And like most mixing decisions, the answer isn’t technical.
It’s musical.
Because the kick drum isn’t just a drum.
It’s the engine of the groove.
And sometimes that engine needs to be…
distressed.